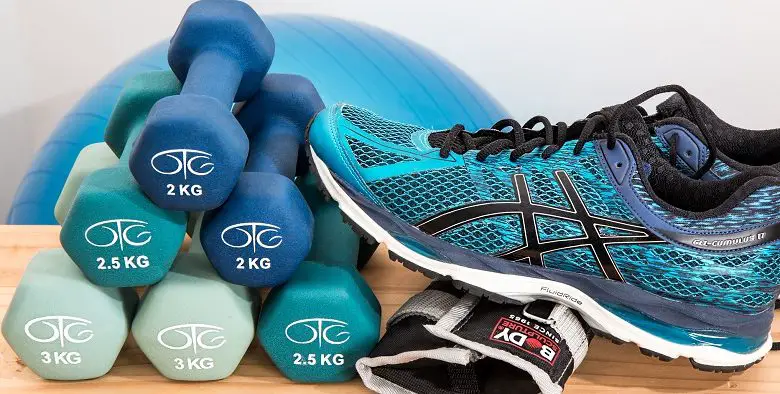
Dom Thorpe is a personal trainer who specialises in working with disabled people to help them get fit and healthy. We’ve asked him to list the top 10 exercises for disabled people with varying abilities, so you can achieve a long-term goal to get fitter, or simply keep active.
There’s a huge array of exercises for disabled people, and just as many ways to tailor them to fit your needs. For each exercise below, I have listed who they’re suitable for, the method and any modifications.
For each exercise/s you choose, you should do three sets. Repeat each 10 times without stopping, then rest for 30 seconds to 1 minute. Repeat a further 10 times, rest again and repeat for a 3rd time. In most cases, try to leave 48 hours between workouts in order to fully rest your muscles and joints. Stressed tissues take time to recover!
In terms of intensity, you should always be trying to better your last performance. That means, if you can complete three sets of 10 on a certain weight, either try to move up to the next weight, or if you don’t have access to heavier weights/resistances, try to increase the number of repetitions or number of sets.
Always be improving – it’s the only way to get fitter. Bear in mind that increasing repetitions will improve your endurance, and increasing weight will improve your strength. Work out which one you’d like to focus on and to achieve your goal.
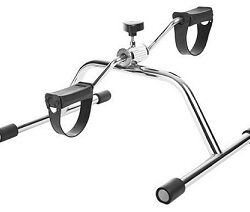
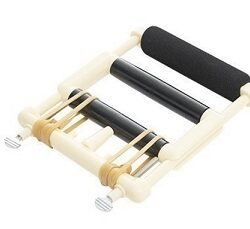
Get fit at home with this pedal exerciser and hand exerciser from the Disability Horizons Shop.
1. Sit to stand
This is my favourite exercise. It’s really good if you have a weakened lower body and need to increase lower body strength and stability.
Suitable for: Conditions where you have some control over your lower body.
Method: Perch your bottom at the front edge of a seat with your feet flat on the floor, behind your knees. Tilt the upper body forward slightly and attempt to push yourself up with your legs into a fully standing position. Slowly lower yourself back down into the seated position you started in.
Modifications: If you can’t do it without the assistance of your arms, place your hands on your knees to help push you up. If your legs are very week, you can use a support, such as a grab rail or worktop. Pull yourself up out of your chair whilst attempting to put as much force through the legs as possible.
2. Seated tricep dips
This exercise will strengthen your triceps, chest and the front of your shoulders. Strengthening those parts of the body will be particularly useful if you transfer from a wheelchair.
Suitable for: Conditions where you have good strength in your upper body.
Method: Sitting, place your hands on the armrests of your wheelchair or another chair. Make sure they are directly beneath your shoulders. Push yourself up until your arms are fully extended, then slowly lower yourself down until you are fully seated again.
Modifications: If you don’t quite have the arm strength, but you do have some leg strength, you can use your legs to assist you slightly. But try to let your arms do as much of the work as possible.
3. Seated knee raises
This is a great way to strengthen the hip flexors – the muscles around your hip that help it to move – and therefore make transferring, walking and bending easier.
Suitable for: Conditions where you have some control over your lower body.
Method: When seated, raise one knee upwards until your foot is several inches off the ground. Lower slowly and repeat the process. Once you’ve completed a set on one side, repeat this on the other leg.
Modifications: If you struggle to get your foot off the floor completely, you can use your calf muscle to flex your ankle, which will assist the movement. Be careful not to let the calf do all of the work though.
4. Sit and walk
For those who need to practice walking, this exercise is ideal. The benefits are two-fold. First, the sit to stand strengthens the legs, and then the short walk serves to improve… wait for it… walking!
Suitable for: Conditions where you have some control over your lower body.
Method: Start with two chairs spaced a few metres apart, but facing each other. Sitting in one of them, perform the sit to stand exercise, then, once up, walk to the other chair. Turn around, sit down in the second chair, then stand up again and walk back to the first chair.
Modifications: It can be done with assistance, crutches or a partner until gradual improvements are made, at which point the assistance can be reduced a bit at a time. You can also vary the distance between the chairs accordingly.
5. Reverse Crunches
This exercise is good for when you want to strengthen your abdominal muscles, but you aren’t strong enough to do a normal crunch or a sit up.
Suitable for: Conditions where you have some control over your abdominal muscles.
Method: Start in a seated position on the floor with your knees bent at 90 degrees. Gradually lower your upper body backwards until you are laying flat on the floor, facing upwards. Get yourself back into the seated position in any way you can, and repeat the lowering process. Try to roll the spine as you lower down, ensuring that each vertebra touches the mat one by one.
Modifications: Use your hands to grip your knees or thighs to help guide you slowly.
6. Back exercises – dorsal raises and seated back extensions
Abdominal exercises need to be balanced out with an exercise that will work your lower back muscles.
Dorsal rise suitable for: Those who are comfortable getting onto the floor and back up from it.
Dorsal raise method: Start the exercise lying face down. Bring your fingertips to your temples and spread your elbows wide. Raise your head and shoulders up from the floor at the same time as your thighs. Slowly lower without relaxing completely by preventing the arms from touching the floor.
Seated back extension suitable for: Those who use a wheelchair and can’t get down onto the floor.
Method for seated back extension: In your wheelchair, or seated on any other stable platform, bend over from the waist until your upper body is facing down toward the floor. From this position, slowly extend the head and back to bring yourself to an upright position and repeat the movement.
Modifications: If you struggle to bring yourself back up to an upright position, you can assist by using your hands to press onto your thighs.
7. Reverse flys with a resistance band
Strengthening your upper back muscles can help to maintain good posture and assist with pulling actions.
Suitable for: Conditions where you have some grip strength and control over your upper body.
Method: In a seated position, take a resistance band in both hands, being sure to leave some slack between the two hands. Hold them out directly in front of you with straight arms. Keeping the arms fixed at the elbow, spread the arms backward as if you are spreading your wings (hence the name ‘flys’). Slowly control the arms forward until you return to the starting position.
Modifications: By varying the amount of slack between the hands, you can increase or decrease the difficulty of the exercise. You can also vary the resistance of the band bu using bands with different tensions.
8. Seated shoulder press
Increasing shoulder strength can help you in situations where you need to lift things above your head.
Suitable for: Conditions where you have some grip strength and control over your upper body.
Method: Using weights, take one in each hand and sit in an upright position. Hold the weights either side of your head, with the palms facing forward, as if you were holding onto a bar. Push the weights above your head, keeping the palms facing forward, until they meet in the middle. Slowly lower them back into the starting position and repeat.
Modification: Try lighter weights if the exercise is too difficult, or no weights at all. Alternatively, you could use a resistance band by sitting on it with the ends in your hands. This could be as slack as you need it to be.
9. Resistance band leg press
This exercise is an easy way to start strengthening your thigh muscles and glutes (butt muscles), especially if the ‘sit to stand’ exercise is beyond your capabilities.
Suitable for: Conditions where you have some control over your lower body.
Method: In a seated position, hold either end of a resistance band in each hand, with the middle of the band looped under one foot. Be sure to create enough tension in the band so that the leg is pulled into a bent position, with the knee facing toward the chin. Maintain the tension and push the foot toward the floor so as to straighten it out and stretch the band. Slowly allow the band to draw the leg back to a bent position.
Modifications: Vary the amount of slack in the band or the tension of it to alter the difficulty. You can also try this exercise in a lying position if you are not comfortable in a seated position.
10. Kneel to stand
This will strengthen your lower body and assist with balance, flexibility and mobility.
Suitable for: Conditions where you have good control over your lower body.
Method: Start in a kneeling position on the floor, but upright as opposed to seated. Bring one leg forward until you can place that foot flat on the floor. From that position, push up to a standing position, then step down again with the same leg, kneeling first. Then bring the other leg back onto the knee, and repeat in the same order. Once you have completed a set leading with one leg, repeat the exercise leading with the other leg.
Modifications: If you struggle with balance, you can use one arm to support yourself on a table, door handle or wall.
For a cardiovascular workout, you can try a circuit by performing the above exercises in sequence, with little or no rest between sets. Do one set of each exercise before moving onto the next. Once you have completed them all, you can break for a couple of minutes before repeating the circuit a few more times.
All video examples of these exercises are on my website: www.dt-training.co.uk/exercise-videos. Be sure to view them to avoid miss-performing the exercises and risking injury.
By Dom Thorpe
If you’d like to train with Dom, you can find out more information and get in touch by visiting his website: www.dt-training.co.uk.
Head to the Disability Horizons Shop to find stylish and practical solutions to everyday problems.

More from Disability Horizons…
- Top tips for getting fit if you’re disabled
- Interview with Paralympian David Weir
- Find out about all-ability marathon Parallel London
- Discover stylish living aids on the Disability Horizons Shop
Get in touch by messaging us on Facebook, tweeting us @DHorizons, emailing us at editor@disabilityhorizons.com or leaving your comments below.

Hi there, thanks for your post! First detailed list I’ve seen. I just have a question, what exercises are best without using arms or legs as I have issues with both and I’m not allowed to strain them.
Some of these looked great to give a go so with enthusiasm (too much as it turned out) I tried a couple with limited success but something to work on, I then tried the seated back extension and tried it with too much gusto and no carer present and ended up falling forward out of my chair and head butted the wall. *Notice to self*….strap yourself into wheelchair before exercising next time and don’t be so stupid.
It’s been very strange, as someone who doesn’t like to stop moving, to be on bed rest, but I’ve been making the best of it with some crutches workouts. You can see these here: https://nynomads.com/2017/12/week-living-hermit-now-time-broken-foot-workout/
These are great. I’m planning now to add several of Dom’s exercises to my routine for fighting back against my Transverse Myelitis.
I’m on the field trip yet here I want to work on your program you please email me thank you it’s from Lisa Williams